 Follow Me On Twitter

7 Popular Beer Adjuncts
Saturday, August 20, 2011
- Fruit and vegetables
- Grain
- Herbs and spices
- Additional sugar
- Bacteria
- Coffee and tea
- Chocolate
Source: Adjuncts - The role and variety of beer adjuncts.


- Fruit and vegetables
- Grain
- Herbs and spices
- Additional sugar
- Bacteria
- Coffee and tea
- Chocolate

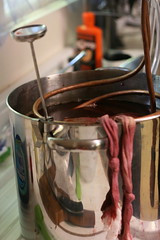
In a brewery, krausening would be done with fresh wort taken from the most recent batch made. For the homebrewer, Krausening is most often done with a small amount of wort made from dry malt extract. Alternately you can use a fresh batch of wort or keep some wort in a sterile container in the refrigerator from your last batch.
A key question is how much wort to use for proper carbonation? A good rule of thumb is that you should add enough wort to raise the gravity of the beer three points. For simplicty you can try the following formula from the Home Brewing Wiki:
Quarts_of_wort = (12 x Gallons_of_beer) / ((Specific_gravity_wort – 1.0) * 1000)
For example, if the krausening addition of wort (also called gyle) has a specific gravity of 1.060, and we’re krausening 5 gallons of beer, the result would be (12 x 5)/((1.060-1)*1000) which works out to exactly one quart of wort we add at bottling.
Read the whole article: Krausening Home Brewed Beer | Home Brewing Beer Blog by BeerSmith

Home Brewing At Its Best: Save Money and Still Have Alcohol
With the prices of nearly everything increasing, you may be looking for ways to save some money. If you like to drink beer every night or throw parties every Friday and/or Saturday night, you know it can get costly to buy your alcohol. Why not save money by doing some home brewing? You don’t have to limit yourself to just alcoholic beverages like beer and wine. If you want, you can make non-alcoholic drinks as well such as cider.
Home brewing is as it states… it’s nothing more than a small-scale fermentation alcohol-making process for your own consumption (although you can make additional beverages for parties). Home brewing may be considered a hobby now but it’s got a history… one that includes an era of illegal activity. If you want to save money and have patience, creativity and like it when things are clean, then you can turn this hobby into a rewarding experience that ensures you admiration from both family and friends.
From The Past To The Present – How Home Brewing Changed Through The Times
Home brewing alcohol drinks is certainly not a new conception. It, in fact, is over 7,000 years old; it began with the Egyptians, Chinese and Mesopotamians. Their brewing beer and wine formulas and procedures were passed on to the Greeks and onto the Romans. It wasn’t until the Sumerian civilization that these brewing methods were written down. When the Sumerians prayed, they would have to sing the recipe to honor the goddess of beer for giving them the best beer. After all, very few Sumerians could read and write.
Bear in mind that whole civilizations came and went and the laws of those remaining civilizations changed. When the Pilgrims first came to North America, landing at Plymouth Rock, they made the decision to include a brewery so they can replenish their beer supply when it got low.
When the Industrial Revolution took off (in the 1700s), beer, wines and other alcoholic beverages were mass produced. However, home brewers could use the hydrometers and thermometers to continue making the product; yet with more precision and reliability. French microbiologist Louis Pasteur discovered and shared his thoughts on the fermentation process while brewing. His thought yielded a whole new way people could brew, which gave their beers and wines some complexities.
The Prohibition Era – How Home Brewers Got Their Alcohol
There have been many dark points in United States history including two World Wars, the Vietnam War, September 11, Civil War, slavery, assassinations, the Great Depression, etc. In 1920, the U.S. had another dark point and it was called Prohibition, which outlawed any and all home brewing activities. Although it was outlawed, lots of people did not obey and continued to make their alcoholic beverages. Some people believe that the law did nothing more but encourage people to make them.
Since people were not able to purchase alcohol in public, they choose to discretely make their own. Two homemade answers to skirting around the law came about. First, there is moonshine, which was alcohol distilled by the moonlight. Second, there was bathtub gun.
Grape Growers and Prohibition
Although people were hiding their alcohol-making habits, grape growers saw an increase in demand, which meant they needed to increase their land space to grow more grapes. These farmers ended up acquiring 700 percent more land to meet the demands. When they sent orders to their customers, they usually came with warning labels, letting them know how to make alcoholic drinks in their advertising without coming out and directly saying.
13 years after it was first passed, the Prohibition Act was repealed but there was a catch. The document that repealed the act did not legalize home brewing of beer; it would stay this way until 46 years later when then-President Jimmy Carter signed a bill into law on February 1. Although there is no federal home brewing restriction, individual states could pass whatever laws they want against it. Today, just three states ban the practice:
- Oklahoma
- Alabama
- Mississippi
Home Brewing Equipment Must-Haves
Are you ready to make your home brews? Does the idea appeal to you to try your hand at making your own beer? If so, then you need to know the home brewing equipment you need. If you want to try and make your own brew, then you can purchase kits that contain the liquid malt extract and no-boil wort.
So what do you need?
1 - You need a plastic carboy, large glass or food-grade bucket. You want something that will tightly seal.
2 - You’ll need a fermentation lock to place at the top; this will allow the carbon dioxide gas in the fermentation process to escape.
3 - You’ll need hydrometers and thermometers so that the ingredients and the process is consistent, which lessen the chance for errors in the brewing process.
4 - You’ll want another carboy if you plan on enhancing the flavor of your beer, wine, etc. With a second carboy you further age your beverage, giving it its final taste.
5 – You’re also going to need some capped or corked bottles once the fermentation process is complete. These will also help in the aging process of your beverage. Now, if you don’t want a bottle capper for your locking mechanism then you can buy flip-top bottles with rubber stoppers.
How To Do Home Brewing – It’s Easier Than It Sounds
When you start home brewing, you have to understand that this is not an overnight process; it’s going to take several weeks of your attention to get done and get done right. The first step you need to take is to make sure everything you’ll be using is free of bacteria, microbes, dirt and more. Unclean tools, bottles, containers and surfaces can make for ruined alcoholic drinks.
Don’t forget the primary ingredient in your recipe, which is wort. You can find it in kits or by cooking and boiling dried or liquid malt extracts. You’re also going to need bittering hops and flavoring hops. Bittering hops needs to be added at the beginning while flavoring hops needs to be added near the ending of the process. This will also depend on what beer style you’re going for.
The actual fun of the process is the experimentation, as you can come up with a wide range of beverages.
After you’ve created the wort, you’ll need to add it to your sterilized food-grade plastic bucket or carboy with water and yeast to begin the first fermentation process. This part of the process can take nearly two weeks, sometimes longer. If you’re doing a second fermentation, you’ll need another clean bucket. Be sure you leave behind some sediment in the first fermentation process.
Once your beverages have fermented, your beer will have to be primed and bottled. Priming is what creates the carbonation in the beer you drink. It’s done by adding tiny amounts of sugar into the bottles or beer before you cap them. If you want this carbonation in your beer, you’ll need to leave the bottles alone an additional four weeks… at least. After you’ve done this, put them in ice or in the refrigerator and then serve them.
The Benefits To Home Brewing As Opposed To Buying Alcoholic Drinks
All persons want to be praised for a job well done and this holds true when it comes to home brewing products. Home brewers are often dedicated to their work and put in long hours to ensure they get a quality batch of beer or whatever concoction they want to have.
Besides getting praise, there are other reasons to make your own batch of beer brew. If you’re the type of person who enjoys saving the environment, you can do so by making your own beer. You don’t use near as many packaging materials and you don’t need to do much transporting of your brew. On top of that, you use those jugs and bottles again and again..
Remember that the price for nearly everything is increasing; this includes liquor. If you want to save money, this is the way to do so without giving up your pleasure of alcohol. The ingredients for your homemade brew can cost anywhere from $25 to $45 per a five-gallon batch. Keep in mind that a five-gallon batch is equal to 24, 12-ounce bottles per case. Initially, the equipment can cost you $80 but in time, it’ll pay for itself.
It’s not that difficult to make your own batch of beer. You can make some today and before you know it, you can sit back in your American Heritage collection furniture and enjoy what you made with family and friends. If you want to, you can always store the extras in your Home Styles bar wine cabinet until you’re ready to drink it. With a little creativity and time, you can have the best beer you’ve ever tasted… made right in your own home.
Article Author Tidbit
Former bar/restaurant owner and HomeBarReviews.com publisher Tom Holmes became highly interested in the home brewing process when he received a wine-making kit from his six children as Christmas present a few years ago. Since then, he kept his eyes and ears open for anything regarding the newest fashions in bar designs and anything related to wine and beer brewing.
Today, he not only shares information regarding beer and wine making, but he’s also keen on sharing information about home bar furniture and tools. You can check out his website HomeBarReviews.com for all in home bars to see what would look best for your home today.
By Graham Williams
There are two main beer-making ingredients that you can grow. Both hops and barley can be grown at home if you want.
Hops are known by the scientific name humulus. It is commonly referred to as hops vines, however the term vine is misleading. The hops plant is actually a bine plant. These plants use stiff stems with hairs to aid in climbing. They will wrap themselves around something in a clockwise fashion to grow. They grow very quickly, growing from 20cm to 50cm per week during peak growth periods.
Hops are perennial plants and are most commonly grown in the temperate regions of the Northern Hemisphere. They are rather easy to grow and can be grown indoors or out. Hops are susceptible to certain types of insects, so caution needs to be taken to prevent insect infestation. Hops flower during summer and the flower seedpod is the actual hops. These can be picked after the seed is formed, usually in August. The hops are then air-dried for several days at which time they are ready for use.
Barley is another main ingredient in beer. Barley is a grain, commonly grown throughout the Northern Hemisphere. It is grown as a major cereal food as well as for animal feed. There are several types of barley. Each type has a different protein and enzyme content and therefore produces different styles of beer. High protein barley is used to produce malt beer. Two-row barley is used in traditional English style ales. Six-row barley is used primarily in lager beer. Four-row barley is not suitable for use in brewing.
It takes a lot of room to produce barley and it cannot be grown well indoors as it needs quite a tall space. Unless you have a large field, you may not be able to grow your own barley. Picking and husking barley can be a tedious process.
While growing your own ingredients for beer can be rewarding and economical, unless you have the time and the space you may want to leave the growing of hops or barley to others.
Graham Williams is the owner of http://www.gw-ebooks.com this site is full of books that are about hobbies such as Brewing your own beer, Camping, Bird watching, Beekeeping. While your there don't forget to sign up to my newsletter and you will receive monthly discounts in any new book that is added each month you can visit my site here http://www.gw-ebooks.com
Article Source: http://EzineArticles.com/?expert=Graham_Williams
http://EzineArticles.com/?How-To-Grow-Your-Own-Ingredients-To-Make-Your-Own-Beer&id=795954
Have New Posts From Making Homemade Wine and Beer Delivered To Your Email
By HomeBrewing.com Staff
The most frustrating aspect of home brewing is when a batch goes bad. The only way to improve your chances of avoiding this depressing situation is to maintain the highest degree of sanitation in your home brewery as is possible. There are also some other pitfalls of the modern age that require a closer look, and some basic tools that will give you the best chances of fighting bacterial infestations, vinegar cultures, and rogue yeasts in your home brew.
One factor often overlooked when cleaning and sanitizing home brew set-ups is that of the water used. Tap water in modern cities is sometimes good, sometimes terrible. It is wise to do some research and find out how your city water rates when analyzed for bacteria, harmful chemicals, and heavy metals. The quality of water used in making beer has a very strong connection with the quality of the finished product. But how to deal with it?
Read more: Homebrewing.com
Beer Making Tips-The Affordable to Great Beer
By Shannon Brown
Brew low cost beer. The amount of time you spend on brewing beer makes the small difference in cost between "just OK" ingredients and top quality ingredients a minor point. Either way, the cost of brewing a 5 gallon batch is much cheaper than buying a couple of cases of beer in the store.
Beer is made of cheap ingredients, so it doesn't hurt to buy the best. Surprisingly, the cheapest way to brew beer gives you the best results: all grain brewing is the cheapest way to brew when grain is bought in bulk.
You do need a grain mill and a mash tun, so there is a small investment in equipment needed. But you should be able to brew excellent quality beer for less than $2 per gallon, and you could brew a mild ale for as little as $1 per gallon, or less than 10 cents per bottle (one gallon is about 10-1/2 12oz bottles). Most of my pilsners are about $1.50 a gallon brews.
Other ways to reduce the cost of your beer are by growing your own hops and reusing yeast from the fermenter. Easy to do, and it means that I don't have to buy yeast more than once every half year or so. The hops should last e through most of the winter brews. So all you need is grain, which is about $0.70 per pound in a bulk purchase (much of the cost is in shipping).
Beer Brewing Equipment Basic, simple, cheap equipment that gets the job done. Sometimes it adds to the challenge. But through the mystique of brewing and remember that illiterate alewives brewed for centuries using tried and true recipes and procedures before the dawn of kegerators, ph meters or hydrometers.
Beer Keg Brewing. After using bottles for years, you can jump to the corny keg (Cornelius keg). This is an important step because it makes brewing so much easier. You can still bottle, but just a few bottles per batch, and use a corny keg to fill the bottles. You can use corny kegs as secondary fermenting vessels. You can try out method where you leave the beer in the primary for about two weeks until it clears nicely, and then upi carefully siphon it over to a corny, avoiding transferring any trub.
Bulk Purchase of Grain and Hops.I purchased about 300lbs of grain and 5lbs of hops from North Country Malt. I have two bags of pilsner, two of Munich, one of pale ale and one carapils. This should cover my base malt needs for a year. I can make my house favorite recipes (pilsner, altbier, pale ale) with the ingredients I have on stock. I hope to work through this supply in about a year, which is the shelf life. I will also order specialty malts and hops as special recipes require.
Beer Drinking Philosophy. Beer is good food. Beer is healthy when used in moderation. Beer is a great beverage.
Shannon Brown is the owner of wemakebeer.com. This site caters to home brewers around the world and has numerous links and resources. You can visit the site at:
http://www.wemakebeer.com
Article Source: http://EzineArticles.com/?expert=Shannon_Brown
http://EzineArticles.com/?Beer-Making-Tips-The-Affordable-to-Great-Beer&id=117041
Have New Posts From Making Homemade Wine and Beer Delivered To Your Email
How The Process Of Beermaking Is Done
Submitted by: Greg Hall
When you think of brewing you probably think of brewing a good cup of coffee. Brewing can also be the process of making alcoholic beverages as well. Beer is one of these beverages that brewing is used for and fermentation is used to make beer.
Brewing can be traced back to ancient Egyptian times. The fermentation process was discovered accidentally by the Sumerians. No one knows exactly how this occurred however as it was not written down. It is thought that it may have had something to do with the making of bread since many of the ingredients are the same and if left without cooking, or completely cooking the bread mixture can ferment. They were able to repeat the process and continue to create the drink, which they obviously enjoyed the first time it happened. The beer of this era could not be stored and did not have any foam. Beer was thought to contain a spirit or god because drinking the mixture seemed to possess the person who drank it.
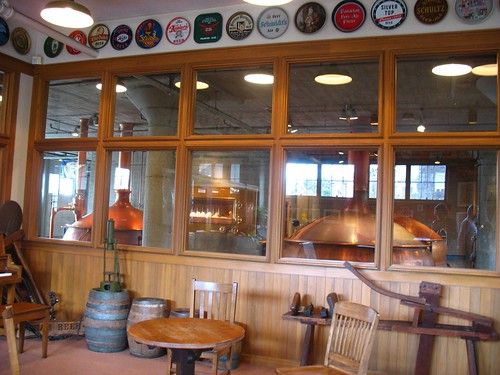
Unlike wine where fruit juices are a big part of the ingredients, beer's major ingredients are malt and hops. Add to this yeast, sugars, and water and in the right combinations and with the right processes you will get beer. The first process to undergo is mashing. Mashing is where crushed malt and hot liquor are combined and kept at a constant temperature for about an hour so that the enzymes convert the starches into a fermentable sugar. The mash would be similar in consistency to cream of wheat or oatmeal.
Water is then filtered through the mixture to dissolve any remaining sugars. This is called sparging. The liquid that is heavy with sugar is known as wort. Boiling is now required to remove excess water, remove microorganisms, remove any sweetness, and develop bitterness. The wort is collected in containers called fermenting vessels.
The next step is fermentation; during this process yeast converts simple sugars into alcohol and carbon dioxide plus a wide range of flavors. Every yeast has its own flavor profile so this explains why each beer company has its own distinct flavor.
Packaging is the last step. At this stage the beer contains alcohol but not a lot of carbon dioxide. In order to fix this there are not a lot of options, the most common one used is forced carbonation by adding it directly to the keg or bottle. Casks for real ale, kegs for brewery carbonate beer, and cans or bottles for take away sales. During packaging you must be careful to not oxidize the beer or it will become stale. It depends on the person as to whether or not the beer is aged.
About Author: Gregg Hall is an author living in Navarre Florida. Find more about this as well as Home Beer Brewing at http://www.brewmybeer.com
Article Source: ArticlesAlley.com
Photo by: colbs
Have New Posts From Making Homemade Wine and Beer Delivered To Your Email

In Geoff Haas' St. Paul basement, a few more batches of home brew bubble away. As he looks over the glass carboys sitting on the table, Haas said, "I've been pretty busy over the holidays, making some beer."
Haas is typical of a growing list of home brewers who are being bitten by the bug. For many of them, it begins with the notion of saving some money -- brewing your own beer and fermenting your own wine can be cheaper than buying it. But for the most avid hobbyists, it becomes an obsession over taste.
"I think now it's just more about the love of the process and the love of beer," Haas said
Read more at WCCO
Have New Posts From Making Homemade Wine and Beer Delivered To Your Email
Submitted by: Paul P.
Home Beer Brewing is becoming an increasingly popular hobby for men and women of all ages. The ever increasing price of drinks at bars and clubs coupled with a greater interest in entertaining at home have made it increasingly popular.
So yes you can start home beer brewing! However it dos not have to be a solitary occupation locked away in the cellar or shed for hour after hour. As well as being a hobby for the individual it can also be a family project through which you introduce members of the family to alcohol and the need to be responsible with it. Some people do not understand why people make their own beer. They wander why they want the all the mess and clutter associated with creating their own brew. They believe that it is far easier to simply go to the store and get what they want when they want beer. However, it is not simply about the convenience or the cost of the beer stores.
The actual reason why a lot of people have started home beer brewing is because they think it is both enjoyable and exciting. This is a way for them to participate in hobby that they like and that keeps them busy. Some people create their own brew just because they have never tried it before and now the proliferation of Home Beer Brewing Kits and other resources provide them with the opportunity relatively cheaply.
It is also a way for individuals to reconnect with their ancestors and family history. There are so many different recipes for beer, not only held by the breweries, but that have also been handed down through different families. They are using the recipes that their ancestors used and seeing if they can do what they did, In the process they are discovering that they can create great tasting beer. Many of the recipes are easy to follow and have an ingredient list that is easy to find. There are different things that people can buy to make their beer making experience more fun.
With the right kit and the best beer-making recipe, it has come within the reach of many more people and anyone can try making great tasting beer. Even if it is a one shot thing, it will be worth seeing if you can create a beer that is just as good as the beer that is purchased in the store. You can create anything with the home beer brewing supplies that you can now find in the store.
Buying the kits to brew your beer is going to make it easier for a lot of people to do. You can get everything that you need with this kit and it will make your beer brewing easier. Finding these kits will make the beer brewing adventure even more fun for someone that has not had the opportunity to try making their own beer yet.
Finding out about making your own beer is easy. You can go online and get all the facts and the tips that you need to get started on making your own beer. There are many tips and pieces of advice that you can use when you start your new hobby of making your own beer and I hope you will enjoy your own beer!
About Author: Paul Duxbury writes extensively on Home Beer Brewing and on Beers and Beer Accessories
Article Source: ArticlesAlley.com
Have New Posts From Making Homemade Wine and Beer Delivered To Your Email

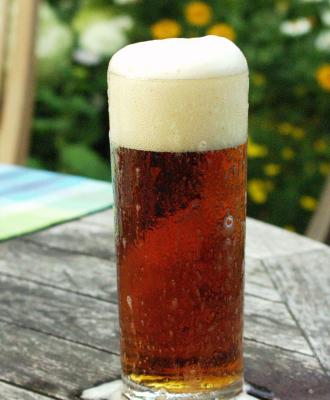
Alt is German for "old", and these beers are of a style older than the lagered beers, a remnant of the time before lager was invented. Altbier is top fermented then cold lagered for a few weeks. Altbiers are copper-bronze in colour and mostly brewed around Düsseldorf. Altbier is the closest Germany gets to the style of a British bitter but the lagering period gives them a quite different character. The best English bitters are cask-conditioned or bottle-conditioned but Germany does not have the tradition of cask-conditioning ales so Altbiers are not cask-conditioned and, when bottled, are not bottle-conditioned. Generally around 4.8abv, mildly fruity, with a typically dry finish, there is more hop bitterness here than in most German beers. A good sessional drink, and goes well with cheese. Source: German Beer Guide
A little history from Wikipedia.com
The Bavarian Reinheitsgebot (beer purity law; literally "purity order") of 1516 was drawn up to ensure the production of decent-quality beer; however, this decree did not affect brewers of the Rhineland. As such, the brewing traditions in this region developed slightly differently. For example, brewing during the summer was illegal in Bavaria, but the cooler climate of the Rhineland allowed Alt brewers to brew all year long and to experiment with storing fermented beer in cool caves and cellars.
The name "altbier" first appeared in the 1800s to differentiate the beers of Düsseldorf from the new pale lager that was gaining a hold on Germany. Brewers in Düsseldorf used the pale malts that were used for the modern pale lagers, but retained the old ("alt") method of using warm fermenting yeasts.
The first brewery to use the name Alt was Schumacher which opened in 1838. The founder, Mathias Schumacher, allowed the pale ale to mature in cool conditions in wooden casks for longer than normal, and laid the foundation for the modern alt beer - an amber coloured, lagered ale. The result is a pale ale that has some of the lean, dryness of a lager, with the fruity notes of an ale.
I have tried a few locally brewed Altbiers and have found them to be quite tasty. For a recipe on how to make an Altbier, try this one: German Altbier.
Subscribe to Making Homemade Wine and Beer by Email
Here is a list of e-books that you can purchase to help you make your own wine and beer.
641 Beer Recipes
Easy Brewing Techniques
The Complete Grape Growers Guide
Tips and Secrets To Making Great Wine
Wine Making Made Easy
Home Winemaking: Step by Step
Nice little article on how beer is made. Great reminder that it really is a simple process.
Very excellent article from Brew Your Own on making malt extract. It's amazing how many things contain one of the basic ingredients of beer. Here's a little excerpt:
| Malt extract is in everything from pretzels to breakfast cereals to, well, beer. But how is it made, and where did it come from? Learn about its history and creation and what it means for your brewing. | |
 Connecting with your food and its ingredients is one of the most rewarding parts of being a brewmaster or chef. Learning where ingredients come from and how they are made gives an understanding of how the variance in breeding, growing conditions, harvesting, storage and processing creates the ingredients’ different flavors and colors. For homebrewers, there are many articles on the “life and times”of different malts and hops, yet little information on the origin of one of their most widely-used ingredients — malt extract. |
My son sent me an e-mail about this brew that he found on Wikihow. It's a very interesting article and closely mirrors my techniques when brewing. Here's a snippet of the article.
Beer is a source of readily absorbed antioxidants. Scientific studies indicate that the moderate consumption of beer, as well as beer-specific antioxidants, may help to promote cardiovascular health [1] and help to reduce the incidence of certain types of cancer.[2] Beer that is particularly high in antioxidants may have a longer shelf life, as it may be more resistant to oxidation.[3] This should result in higher quality, more stable sensory characteristics, such as flavor and aroma. Certain hop polyphenol antioxidants can also contribute to desirable foam stability. Beer is a complex beverage that is brewed using various ingredients and various types of equipment. Therefore, beer can be brewed to contain greater concentrations of antioxidants.

India Pale Ale, otherwise known as an IPA, is a distinct style of beer and is characterized as a sparkling pale ale with a slightly higher level of alcohol and hops than a typical Pale Ale; the hops lend it a distinct bitterness.
The IPA came about in the mid 1700's as a way for British brewers to ship unspoiled beer to India. The increase in hops and alcohol prevented the beer from spoiling and made for a rather strong tasty brew.
Characteristics of this beer can, as with other styles, vary somewhat, but an IPA will always exhibit the alcohol and hopping that distinguished the original. English brewers designed their IPAs with original gravities of 1070 and above, which translates to alcohol levels of a whopping 7.5 to 8%. Modern recipes usually attain a more modest level of 1050 to 1060 OG, for a subdued, yet still noticeable strength of 5.5 to 7%. Specialty malt additions of carapils and crystal contributes to the deep copper\amber color and provides an undertone of faint but perceptible caramel. Conditioning favors the mild end of the spectrum but at times might be considered quite lively when compared with other English ales.
In general, a traditional IPA will possess a nose of perfumey alcohol, fruitiness, and malt, although newer versions frequently overshadow the malt with strong hops. English brewers typically use hop varieties of Goldings and Fuggles, while American renditions of IPA employ Northern Brewer, Cascade, and Chinook, which project notes of citric or grapefruit-like flavors.


© Blogger templates Newspaper II by Ourblogtemplates.com 2008
Back to TOP