Making Your Own Wine
Tuesday, February 26, 2008
So, you want to make your first wine? How do you get started and what equipment do you need? Hopefully I'll be able to guide you through the process.
The first step is to decide what kind of wine you plan on making. Do you plan on making it from fresh fruit? Or, do you plan on using juice? Let's start with using frozen juice.

One of the simple ways to make wine is to use frozen juice concentrate. I have used Welch's frozen concentrate for numerous wines. For a recipe, click here. You must use the frozen since it does not contain potassium sorbate. The potassium sorbate will prevent your wine from fermenting. So make sure you buy the frozen kind of juice.
You can also buy juice in 5 gallon containers and these are usually specific kinds of juice. ie Merlot, Syrah, etc.
Another kind of juice that you can buy is Vintner's Harvest. Usually this comes in 46 ounce or 92 ounce cans and is usually fruit. Ie. Peach, Cranberry, Raspberry, etc. The side of the can provides generic instructions on making your wine.
 Usually this comes in 46 ounce or 92 ounce cans and is usually fruit. Ie. Peach, Cranberry, Raspberry, etc. The side of the can provides generic instructions on making your wine.
Ok, back to the frozen juice. Next you have to decide if you want a light bodied, medium bodied or full bodied wine. The recipe is pretty easy to remember. 1 can per gallon for a light bodied wine, 2 cans for a medium bodied wine, and 3 cans for full bodied wine.
Next pour your juice into your fermenter. I use an Ale Pail. Fill it to about the 3 gallon mark with juice and water. This fermenter has a lid and airlock, which I do not use for the primary fermentation. You can if you want, but I kinda' like to watch my wine ferment.
If you plan on using fresh fruit, then you must crush the fruit first. For a batch that is less than 5 gallons, I use a potato masher.Crush your fruit and add it to your fermenter.
At this point we need to test for sugar and acidity.
At this stage, it is easy to adjust your acid content as well as your sugar content. Trying to test after the fact is a major pain in the butt, so you want to do this part every time you make wine.
Let's start with checking for acid. You can use Ph paper but a more accurate way is to use an acid testing kit.
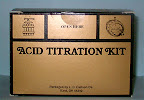 Acid testing kit
You can usually purchase a kit for around $7. Depending on the type of wine you are making, the acid percentage should be around .60% to .85%. The kit tells you what your percentage by generally fruit (peach, strawberry, etc.) and red wines should be lower in acid and the whites should be higher. The kit includes a bottle of sodium hydroxide, coloring agent, testing tube and a syringe.
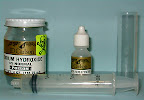 Parts of the acid testing kit
The process to test is rather simple. First you take the testing tube and fill it 15 cc of your must.
 Testing tube with 15 cc of must
The second step is to put 3 drops of the coloring agent into the testing tube. Third step involves filling the syringe with 10 cc of sodium hydroxide. Caution -- Sodium hydroxide is very poisonous, be extremely careful around pets and children. The last step is to slowly put 1 cc of sodium hydroxide at a time into the testing tube until it changes color. At that point, you will know the percentage acid in your must. Basically, if you put in 5 cc of sodium hydroxide, then your must has .50% of acid content.
 Testing tube after it has changed colors
After you determine the percentage of acid in your must, then you can make the necessary adjustments. If you need to raise your acid content, add acid blend according to the directions on the kit. If your acid content is too high, then add water and retest. I usually shot for anything between .60 and .70 for most of my wines and I usually don't sweat it if it comes to .70 when it should be .65. What you really don't want it a wine that is too low in acid or too high in acid because it will make some very nasty wine. And, I mean nasty in a bad way, not a good way. Now that the acid testing is complete, we can move to testing for the amount of sugar.
To measure sugar content we use an instrument called a hydrometer. A hydrometer looks like a thermometer but with a bubble at the end. For more info on how to read a hydrometer, click here. Basically water will read 1.000 on a hydrometer and most wines will ferment a few steps below that level. For most wines, you want the hydrometer reading to be 1.085 - 1.095. Most hydrometers will have 3 scales on them. Personally, I like the 1.000 system instead of Plato or Brix.
 Hydrometer in testing tube.
Notice that the hydrometer is barely over the top of the tube. This liquid was 1.000
Pour some of your must in the testing tube and then put the hydrometer in. Check the scale, if not enough sugar, add white table sugar a cup at a time. If you have too much sugar (over 1.100), then add some water
. Added some sugar.
 Added some sugar.
Notice that the hydrometer sticks up higher in the testing tube. This measured about 1.020.
In the first post, I mentioned when using juice concentrate to fill your fermenter to the 3 gallon line before adding sugar. What I usually do at this point is to warm up 1 gallon of water and stir in 1 1/2 bags (5 lb) of table sugar. Once that is dissolved, pour it in the fermenter and stir for about 30 seconds. Then test your must for its sugar content. Too high, add some water, too low add some sugar.
We are now ready to add all the other things that go into your wine so that it can ferment properly.
One thing that almost all wine needs to get it going is yeast nutrient. This acts as a jump starter to get the yeast cells motivated to turn the sugar into alcohol. You don't need to use a lot of this so follow the directions on the label for dosage .
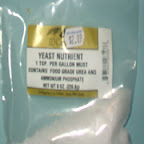
For wines other than grape wines, you usually have to add a little grape tannin to your must. I generally only use 1/8 of a teaspoon per gallon. If you are in a pinch you can use raisins instead of grape tannin. A handful of raisins per gallon should be enough.


Certain types of fruit will require you to add pectin enzyme to your must. This breaks down any pectin that is in your wine. Pectin in your wine makes it very difficult to fine and clarify. So, for things like peach wine, strawberry wine, apple, wine, etc, use the pectin enzyme.
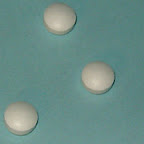 Campden Tablets
Campden tablets or sulphur dioxide is the last thing that you add to your must before adding the yeast. This will help to sterilize the must and kill any wild yeast cells that are hanging around. Generally, most people will tell you to add 2 tablets per gallon of must. Personally, I use about 1.5 tablets to a gallon before the fermentation, 1 tablet per gallon on the second racking and for the last racking prior to bottling.
After these items have been added to your must, leave the must alone for at least 24 hours. Do not add yeast until the after 24 hours because the capmden tablets will kill it if added now.
Last item to add is the yeast. There are quite a few different yeasts out there, but they fall into 2 categories, dry or liquid. With the liquid variety, you are able to make more style specific wines. Personally, I use the dry wine yeast because it is a lot cheaper and because most of my wines are fruit wines. The 2 major dry yeast companies are Red Star and Lavlin. I prefer the Lavlin yeast since it seems to make a smoother wine than the Red Star.
Now, it is time to begin fermenting.
There are two types of fermenting styles. One style is closed and the other is open. Personally, I prefer and open style of fermenting. This is quite contrary to what most books and other wine makers will tell you. My rationale for an open system is that since yeast need oxygen to convert the sugar, then more oxygen will help the yeast.
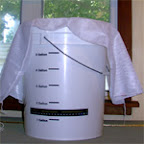 This is the system that I use for my primary fermentation.
 This system is primarily a bucket with a large grain/fruit bag tied to the top. If you plan on using this system, keep it up and away from children and pets. Primary fermentation will take about 5 - 7 days. During this time, the solids will float to the top due to the activity of the yeast. This should be "punched down" or gently stirred back into the fermenting wine at least once a day and if you are able to do it, twice a day.
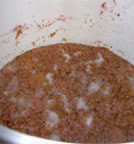 This is what the solids look like.
 When it is time to transfer to your secondary, the one thing that I do is to skim the solids off prior to racking over. Most times I use a slotted spoon to allow any liquid to flow through. These solids are pretty thick, so they tend not to fall back into the wine when you are scooping it out.
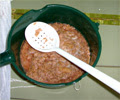 Scooping out the solids.
 To rack over to my secondary, I use a funnel. Other people will tell you to use a siphon system. Personally, using the funnel is easier and quicker so that is what I use.
 Secondary fermenter ready for the wine.
 Notice the handle? Best investment when using glass carboys.
Pour the wine into your secondary, put an airlock on it and let it be. Generally, I'll let my wine sit for a month or two before racking it over again. It really depends on how many solids have settled at the bottom. If a lot have settled then I rack it over in about a week or two. Otherwise, let it clear up a bit before racking again.
After about the third racking, I rack the wine into a one gallon jug and put an airlock on it for about two weeks. Then I cap it. The one gallon jugs are easier to handle when it comes time to bottle, because I use a funnel to bottle .
 One gallon jug with airlock
 At bottling time, clean and sanitize your bottles along with your corks or screw caps. Use a funnel and pour your wine from the one gallon jug into your bottle. Cap it and let it age for a few months. I have gone to using screw capped bottles because they are easier to open. Also, with the screw cap bottles, you can open it and sample it before given it to someone. It saves on being embarrassed about given your friends some really nasty wine.
Well, that's it in a nutshell. Time, to kick back and enjoy some wine.

 Follow Me On Twitter

6 comments:
I am starting this thursday almost exactly step by step, i am for sure doing a batch with all welches grape but if i can get ahold of another carboy i might do a batch 1/3 fruitpoia watermelon blueberry and 2/3 welches grape,, wahts your take on that??
Sounds like it might work. Just check the Fruitopia to make sure that there is no preservatives in it to hamper fermentation.
The combination sounds rather tasty, blueberry, watermelon and grape. Your really making me thirsty with that combination.
Let us know how it worked out.
Got any tips for maximizing the alcohol content. I tried some homemade stuff last week and it tasted like a mix between brandy and... deisel fuel.... but it really messed me up... and it certainly wasn't a still. It was an open fermentation as you described. Although, I did hear him mention he messed with the sugar and yeast a lot.. possibly adding more in the middle of the process? Does that sound right? Sounds more like a game of chance to me... although I've only made a couple batches of hard cider thus far.
Yeah, adding more sugar while it is fermenting will boost the alcohol content. Most wine yeast will go to about 17% before it will quit working. A cup of sugar every other week for a couple months should give you the maximum in alcohol.
Love this blog. Full of info for a beginner like me. Thanks!
I have made potato wine for a while and did 5 gallons about 2 months ago. When I tasted it to find out how it turned out it had hardly any alcohol, and it just tasted like a sugary liquid. Can anyone help me get the wine to normal?
Post a Comment