Your Source For Making Wine and Beer

Showing posts with label How To. Show all posts

Tips for Successful Backyard Grape Growing

Monday, May 09, 2011

By Jim Bruce


Growing grapes in the backyard or garden can be a rewarding experience. It can also be quite a failure if not done properly. Grapevines are perennial plants and will grow for years to come. There are a few things to consider before you just jump in and start planting your grapevines. Otherwise, mistakes made at planting will haunt you in the future.


Grapes need lots of sunshine. One of the biggest mistakes that the home gardener makes when growing grapes is to plant them in the shade under a tree or where they get shaded by houses most of the day. If you watch wild grapevines grow, you will notice they make all efforts to climb trees and shrubs to get into the daylight. Without proper sunlight, proper ripeness cannot be obtained. Be sure the spot you choose has good sun most of the day.


A second mistake that many home gardeners make is to not take into account the grape variety's growth habit and vigor. These two factors come into play when planting the grapevine and deciding on how to trellis the vine.


Vigorous varieties need lots of space. You can find out how vigorous a variety is by consulting your local nursery where you bought your vines. Vigorous varieties need eight feet between vines when planting. Less vigorous varieties can be planted closer at six feet between vines. Very low vigor vines can be planted as close as four feet.


Growth habit determines the trellis type and how the grapevine will be trained and pruned. Grape varieties with a large portion of their ancestry coming from wild American species tend to droop. These are like the wild vines that grow to the top of small trees and shrubs then cascade downward during the summer. The gardener will find that it is best to mimic this natural growth.


Vines of this type will be trained to a high wire about six feet off the ground. The grapevines are pruned to two to four long canes each year. As the shoots grow each year from the canes left at pruning time, they will grow outward from each side and soon start drooping towards the ground, forming a curtain of leaves by the end of the growing season.


Many varieties have the European grape, V.vinifera, in their ancestry. The European grape varieties tend to have a more upright growth. These grape varieties need a more extensive trellis system. At least four wires are needed to contain them. The first wire is approximately three feet off the ground with the two additional wires at eight inch intervals above the bottom wire. The vines are trained to a trunk that extends to the bottom wire.


Two to four canes are pruned and tied to the bottom wire on each side of the trunk. As the shoots grow during the spring and summer they are tied straight up to the wires above. Once the shoots have reached approximately 16 inches above the top wire, they are cut off at the tips. This "hedging" prevents further growth and shading of the vine below.


Grapes need a good water supply when they are actively growing in the spring and summer. They should be watered at least once a week in areas of little rain. More often under droughty conditions. This watering shoud be continued until the berries begin to turn color. After coloring, watering is not needed and will in fact slow the ripening process. Once the leaves have fallen in the fall, one last large watering should be undertaken before the ground freezes to get the vines through the winter.


Perhaps the biggest mistake I see with home gardeners growing grapes is neglecting pruning the vines each year. This is a must! Without pruning the grapevine becomes an overgrown tangled mess. The grapevines overbear and the berries don't ripen properly. Disease sets in as the vine is over shaded and doesn't recieve drying winds. The vines will weaken over time and eventually die before their time.


Pruning removes 90-95% of the previous year's growth. It keeps the vines in balance and aids in controlling the crop and ripening the fruit. Pruning the grapevine is an art, not a science. Information on grapevine pruning can be obtained through your local Ag Extension agent. They have agricultural bulletins that detail the pruning process. You can also find comments at: http://www.ristcanyonvineyards.com/grapevine_pruning_and_training.html


Growing grapevines can be a nice hobby that will provide you and your family with fresh fruit or grapes to make wine with. Table grape varieties and wine varieties are distinct. Make sure you are planting the proper varieties for the wanted purpose. Home gardeners should also make sure that the varieties they are planting are adapted to their local climate. Some varieties cannot take cold winters, while others can tolerate freezing temperatures down to -25-30F.


Varieties that have American grape species in their ancestry can tolerate colder winters. Make sure you consult with your nurseryman to fit the variety you are planting to your conditions. The variety you choose must also be able to ripen in your climate. I see too many home gardeners planting varieties that take up to 170 days or more to ripen in areas that have only 150 days or less in their growing seasons.


If you are thinking of growing grapevines in your backyard or garden, be sure to consider the above factors before you start planting. Choose your grape varieties based upon what you plan to use them for, how they are adapted to the local growing conditions, and plan the trellis according to the variety's growth habit. I wish you all the luck in your endeavor.


Jim Bruce has been growing grapes since the mid-seventies under a range of growing conditions. His Rist Canyon Vineyards is a research project to aid others in growing grapes. More information can be found at http://www.ristcanyonvineyards.com


Article Source: http://EzineArticles.com/?expert=Jim_Bruce
http://EzineArticles.com/?Tips-For-Successful-Backyard-Grape-Growing&id=57486


Have New Posts From Making Homemade Wine and Beer Delivered To Your Email

Read more...

Wine Video

Thursday, May 08, 2008

Read more...

How To Prune Raspberries and Blackberries

Thursday, April 17, 2008

This is a nice video on how to prune your raspberries and blackberries. Both make fine wines.


Read more...

Pouring a Black and Tan

Thursday, February 28, 2008

It's almost St.Patrick's day and everyone likes to act like they are Irish. And what's more Irish, than Guinness. Use a bottle of your homebrew and a can of Guinness to make your own Black and Tan's. This article tells you how to make a Black and Tan along with some other background. Experiment and have fun.


Read more...

Making Your Own Wine

Tuesday, February 26, 2008


So, you want to make your first wine? How do you get started and what equipment do you need? Hopefully I'll be able to guide you through the process.

The first step is to decide what kind of wine you plan on making. Do you plan on making it from fresh fruit? Or, do you plan on using juice? Let's start with using frozen juice.


One of the simple ways to make wine is to use frozen juice concentrate. I have used Welch's frozen concentrate for numerous wines. For a recipe, click here. You must use the frozen since it does not contain potassium sorbate. The potassium sorbate will prevent your wine from fermenting. So make sure you buy the frozen kind of juice.


You can also buy juice in 5 gallon containers and these are usually specific kinds of juice. ie Merlot, Syrah, etc
.

Another kind of juice that you can buy is Vintner's Harvest. Usually this comes in 46 ounce or 92 ounce cans and is usually fruit. Ie. Peach, Cranberry, Raspberry, etc. The side of the can provides generic instructions on making your wine.

Ok, back to the frozen juice. Next you have to decide if you want a light bodied, medium bodied or full bodied wine. The recipe is pretty easy to remember. 1 can per gallon for a light bodied wine, 2 cans for a medium bodied wine, and 3 cans for full bodied wine.

Next pour your juice into your fermenter. I use an Ale Pail. Fill it to about the 3 gallon mark with juice and water. This fermenter has a lid and airlock, which I do not use for the primary fermentation. You can if you want, but I kinda' like to watch my wine ferment.

If you plan on using fresh fruit, then you must crush the fruit first. For a batch that is less than 5 gallons, I use a potato masher.Crush your fruit and add it to your fermenter.

At this point we need to test for sugar and acidity.

At this stage, it is easy to adjust your acid content as well as your sugar content. Trying to test after the fact is a major pain in the butt, so you want to do this part every time you make wine.

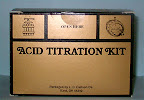
Let's start with checking for acid. You can use Ph paper but a more accurate way is to use an acid testing kit.

Acid testing kit


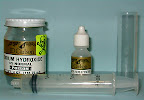
You can usually purchase a kit for around $7. Depending on the type of wine you are making, the acid percentage should be around .60% to .85%. The kit tells you what your percentage by generally fruit (peach, strawberry, etc.) and red wines should be lower in acid and the whites should be higher. The kit includes a bottle of sodium hydroxide, coloring agent, testing tube and a syringe
.

Parts of the acid testing kit

The process to test is rather simple. First you take the testing tube and fill it 15 cc of your must.

Testing tube with 15 cc of must

The second step is to put 3 drops of the coloring agent into the testing tube. Third step involves filling the syringe with 10 cc of sodium hydroxide. Caution -- Sodium hydroxide is very poisonous, be extremely careful around pets and children. The last step is to slowly put 1 cc of sodium hydroxide at a time into the testing tube until it changes color. At that point, you will know the percentage acid in your must. Basically, if you put in 5 cc of sodium hydroxide, then your must has .50% of acid content.

Testing tube after it has changed colors

After you determine the percentage of acid in your must, then you can make the necessary adjustments. If you need to raise your acid content, add acid blend according to the directions on the kit. If your acid content is too high, then add water and retest. I usually shot for anything between .60 and .70 for most of my wines and I usually don't sweat it if it comes to .70 when it should be .65. What you really don't want it a wine that is too low in acid or too high in acid because it will make some very nasty wine. And, I mean nasty in a bad way, not a good way. Now that the acid testing is complete, we can move to testing for the amount of sugar.

To measure sugar content we use an instrument called a hydrometer. A hydrometer looks like a thermometer but with a bubble at the end. For more info on how to read a hydrometer, click here. Basically water will read 1.000 on a hydrometer and most wines will ferment a few steps below that level. For most wines, you want the hydrometer reading to be 1.085 - 1.095. Most hydrometers will have 3 scales on them. Personally, I like the 1.000 system instead of Plato or Brix.

Hydrometer in testing tube.

Notice that the hydrometer is barely over the top of the tube. This liquid was 1.000

Pour some of your must in the testing tube and then put the hydrometer in. Check the scale, if not enough sugar, add white table sugar a cup at a time. If you have too much sugar (over 1.100), then add some water

. Added some sugar.

Notice that the hydrometer sticks up higher in the testing tube. This measured about 1.020
.

In the first post, I mentioned when using juice concentrate to fill your fermenter to the 3 gallon line before adding sugar. What I usually do at this point is to warm up 1 gallon of water and stir in 1 1/2 bags (5 lb) of table sugar. Once that is dissolved, pour it in the fermenter and stir for about 30 seconds. Then test your must for its sugar content. Too high, add some water, too low add some sugar.

We are now ready to add all the other things that go into your wine so that it can ferment properly.

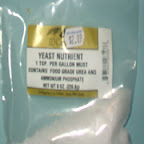
One thing that almost all wine needs to get it going is yeast nutrient. This acts as a jump starter to get the yeast cells motivated to turn the sugar into alcohol. You don't need to use a lot of this so follow the directions on the label for dosage .


For wines other than grape wines, you usually have to add a little grape tannin to your must. I generally only use 1/8 of a teaspoon per gallon. If you are in a pinch you can use raisins instead of grape tannin. A handful of raisins per gallon should be enough.


Certain types of fruit will require you to add pectin enzyme to your must. This breaks down any pectin that is in your wine. Pectin in your wine makes it very difficult to fine and clarify. So, for things like peach wine, strawberry wine, apple, wine, etc, use the pectin enzyme.

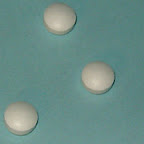
Campden Tablets

Campden tablets or sulphur dioxide is the last thing that you add to your must before adding the yeast. This will help to sterilize the must and kill any wild yeast cells that are hanging around. Generally, most people will tell you to add 2 tablets per gallon of must. Personally, I use about 1.5 tablets to a gallon before the fermentation, 1 tablet per gallon on the second racking and for the last racking prior to bottling.

After these items have been added to your must, leave the must alone for at least 24 hours. Do not add yeast until the after 24 hours because the capmden tablets will kill it if added now.

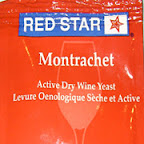
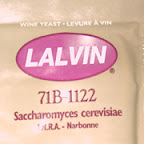
Last item to add is the yeast. There are quite a few different yeasts out there, but they fall into 2 categories, dry or liquid. With the liquid variety, you are able to make more style specific wines. Personally, I use the dry wine yeast because it is a lot cheaper and because most of my wines are fruit wines. The 2 major dry yeast companies are Red Star and Lavlin. I prefer the Lavlin yeast since it seems to make a smoother wine than the Red Star.


Now, it is time to begin fermenting.

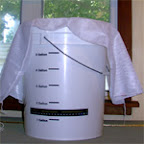
There are two types of fermenting styles. One style is closed and the other is open. Personally, I prefer and open style of fermenting. This is quite contrary to what most books and other wine makers will tell you. My rationale for an open system is that since yeast need oxygen to convert the sugar, then more oxygen will help the yeast.

This is the system that I use for my primary fermentation.

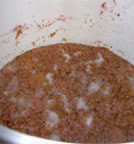
This system is primarily a bucket with a large grain/fruit bag tied to the top. If you plan on using this system, keep it up and away from children and pets. Primary fermentation will take about 5 - 7 days. During this time, the solids will float to the top due to the activity of the yeast. This should be "punched down" or gently stirred back into the fermenting wine at least once a day and if you are able to do it, twice a day.

This is what the solids look like.

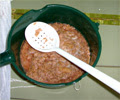
When it is time to transfer to your secondary, the one thing that I do is to skim the solids off prior to racking over. Most times I use a slotted spoon to allow any liquid to flow through. These solids are pretty thick, so they tend not to fall back into the wine when you are scooping it out.

Scooping out the solids.

To rack over to my secondary, I use a funnel. Other people will tell you to use a siphon system. Personally, using the funnel is easier and quicker so that is what I use.

Secondary fermenter ready for the wine.

Notice the handle?
Best investment when using glass carboys.

Pour the wine into your secondary, put an airlock on it and let it be. Generally, I'll let my wine sit for a month or two before racking it over again. It really depends on how many solids have settled at the bottom. If a lot have settled then I rack it over in about a week or two. Otherwise, let it clear up a bit before racking again.

After about the third racking, I rack the wine into a one gallon jug and put an airlock on it for about two weeks. Then I cap it. The one gallon jugs are easier to handle when it comes time to bottle, because I use a funnel to bottle .

One gallon jug with airlock

At bottling time, clean and sanitize your bottles along with your corks or screw caps. Use a funnel and pour your wine from the one gallon jug into your bottle. Cap it and let it age for a few months. I have gone to using screw capped bottles because they are easier to open. Also, with the screw cap bottles, you can open it and sample it before given it to someone. It saves on being embarrassed about given your friends some really nasty wine.

Well, that's it in a nutshell. Time, to kick back and enjoy some wine.

Read more...

Brix Scale Calculations

Tuesday, January 22, 2008

In beer making you usually hear of Original Gravities being 1.0 something and some winemakers will do the same. More common in winemaking is the Brix Scale. So, what is the Brix scale and why should I know it. Basically, it measures the sugar content of your juice and knowing that you can get an idea of how much alcohol your wine will produce. Here are a couple of definitions:
Brix scale from Answers.com

A system of measurement, given in degrees, of the amount of sugar present in grape juice. Similar systems are used in different countries, eg. the Balling, Baumé and Oechsle scales, all providing sugar content measurements that can be used to approximate the final alcohol content of wine being produced. See also must weight.

Another definition from Onlineconversion.com

Balling: The name of a density scale for measuring sugar content in water base solutions. Since grape juice is primarily sugar and water, the balling scale was used for a quick and easy "sugar analysis" of juice. The Balling scale contained a slight inaccuracy however, and it was corrected by Dr Brix. Today the Brix scale is in actual use, but the terms Balling and Brix often are used interchangeably.

The Balling (Brix) scale is simplicity itself: Each degree is equivalent to 1 percent of sugar in the juice. For example, grape juice which measures 15.5 degrees on the Balling or Brix scale contains about 15.5% sugar.

Now that you know the Brix of your juice, you can easily fiqure out how much alcohol your juice will make by using this formula:

Brix count x .575

So if your brix count is 23, take 23 x .575, which equals 13.23. Your wine should be slightly over 13% alcohol content whenever it is done fermenting.

Related articles:

Using Your Hydrometer - Part 1

Using Your Hydrometer - Part 2


AddThis Social Bookmark Button

Subscribe in a reader


Technorati Tags: , , , , ,

Read more...

Using Your Hydrometer - Part 2

Tuesday, January 15, 2008

Part 1 of Using Your Hydrometer deals with how to measure the sugar content of your must or wort. There are a couple of things you need to know to get an accurate measurement.

Most hydrometers are calibrated to give correct readings at 59-60 degrees Fahrenheit. Higher temperatures thin the liquid slightly and result in lower readings than you'd get at the correct temperature. At 70 degrees F., the reading will be 0.001 low. To correct it, add 0.001 to the reading. At 77 degrees F., add 0.002. At 84 degrees F., add 0.003. At 95 degrees F., add 0.005. At temperatures above 95 degrees F., you risk killing your yeast and losing your wine. If you can't remember all that just print out the chart below.


Another thing you need to know is that most hydrometers come with three scales. Specific Gravity, Balling and Brix are the ones that are usually on your hydrometer. Specific Gravity and Brix are the ones that are most used.
Sugar can be measured as ounces per gallon or as degrees Balling, or Brix. Ounces per gallon are measured on a numeric scale in which an S.G. of 1.046 equals 16 oz. (one pound) of sugar per U.S. gallon. Brix is measured as a percentage of sugar by which pure water has a Brix of 0 (or 0% sugar), an S.G. of 1.046 equals a Brix of 11.5 (11.5% sugar), and an S.G. of 1.095 equals a Brix of 22.5 (22.5% sugar). If you have a choice and want to simplify your life, buy a hydrometer that measures sugar by ounces per gallon .

Lastly, the real reason why we use a hydrometer is to make the perfect wine. Here's a guide to the amount of sugar that should be used.
Table wines are generally started at an S.G. of 1.090 or higher and fermented to dryness--0.990 to 1.000. Sweeter wines are started at a higher S.G. using a yeast that will die out at predictable point and stabilized at that time and at the desired sweetness to prevent die-hard yeast cells from re-populating the wine, or, more commonly, started at 1.090 or higher, fermented to dryness, stabilized, and sugar added back to the wine to sweeten it. The 1.090 specific gravity is a rather magical number. It produces an alcohol level of about 12.3%, a level that ensures the wine's preservation. I usually start at 1.095, or about 13% alcohol, because I know I will lose some volume in racking and add water to make it up, thereby diluting the wine and the percent alcohol by volume. In truth, a hair over 10% alcohol is all that's required to preserve grape wine. But some fruit wines actually require the 12% level for unrefrigerated preservation, so using 12% as a rule of thumb errs, if at all, on the side of safety.

That should cover everything you need to know about your hydrometer and how to use it.

Related Posts:

Using Your Hydrometer - Part 1

Brix Scale Calculations


AddThis Social Bookmark Button

Subscribe in a reader

Tags: , , , ,

Read more...

Using Your Hydrometer - Part 1

Tuesday, January 08, 2008

The hydrometer is a simple instrument that measures the weight--or gravity--of a liquid in relation to the weight of water. Because the relation of the gravity to water is specified, the resulting measure is called a specific gravity. A hydrometer will float higher in a heavy liquid, such as one with a quantity of sugar dissolved in it, and lower in a light liquid, such as water or alcohol. In truth, the average winemaker has no interest in the specific gravity of a must per se, but has a very keen interest in the amount of sugar dissolved in it, for yeast converts sugar into carbon dioxide and alcohol. By knowing how much sugar one started with and ended with, one can easily calculate the resulting alcohol.

There are many variants of the hydrometer. Some have only one scale, some two and some three. The typical hydrometer measures three things: specific gravity (S.G.), potential alcohol (P.A.), and sugar.

How To Use The Hydrometer

It's really pretty easy to use the hydrometer; just follow these simple steps:


1. Sanitize the hydrometer, wine thief, and test jar.

2. Place test cylinder on flat surface.

3. Draw a sample of "clean" must or wine with the wine thief - avoid testing samples that contain solid particles, since this will affect the readings.

4. Fill the test jar with enough liquid to just float the hydrometer - about 80% full.

5. Gently lower the hydrometer into the test jar; spin the hydrometer as you release it, so no bubbles stick to the bottom of the hydrometer (this can also affect readings).

6. Making sure the hydrometer isn't touching the sides of the test jar and is floating freely, take a reading across the bottom of the meniscus (see diagram to the left). Meniscus is a fancy word for the curved surface of the liquid.

7. Be sure to take good records of your readings!

That's it! Pretty simple, huh. There are a couple other things that we need to knew about the hydrometer, which will be covered next week.

Related Posts:

Using Your Hydrometer - Part 2

Brix Scale Calculations


AddThis Social Bookmark Button

Subscribe in a reader

Tags: , , , ,

Read more...

Make Your Own Hobby Guide

Tuesday, October 30, 2007

Found this article and thought that I would share it with you. I have made cheese and butter but have never roasted my own coffee. Something that I might want to try in the future.

"Make Your Own" Hobby Guide Oct, 2007

You already make your own beer. How about trying your hand making your own cheese or roasting your own coffee? The list of foods and beverages you can make yourself is almost limitless. Plus, when you make it yourself you get to craft it exactly how you like it. Check out these businesses that will help you "make your own".


THE COFFEE PROJECT
New to roasting? We've got home coffee roasting equipment, green beans and supplies. Take 10% off your first order by using the coupon code "cheers" when you order online before November 1st. Think outside the line. Call us at 1-800-779-7578 or visit our website.
www.coffeeproject.com

Read More Make Your Own at Brew Your Own

Read more...

Cheap Way To Make Wine

Tuesday, October 09, 2007

Thought that I would experiment with some video and found this series at YouTube.com. I like the way he takes ordinary household items to make his wine. Just goes to show you that you don't need to spend a lot of money to get started. Hope you enjoy.


More In The Series:

Part 2

Part 3

Part 4

Part 5


Technorati Tags: , , , ,

Read more...

Building A Grape Trellis

Friday, March 09, 2007

This is a rare Friday post, well actually it is suppose to be yesterday's post. We are in the process of prepacking for a move in a couple of months, so I spent most of my time working on that. I never really knew that I had so many wine and beer bottles laying around the house. So, I filled a bunch of them and will be giving them to my work buds.

I researched quite a few sites and this site from Iowa State is the best one. It is 64 pages long, in PDF format and has lots of pictures. This is the one I would recommend that you read.

If you just want the general idea of a trellis, this little excerpt from the Mother Earth News, sums it up.

Trellis the grapes on a three-wire trellis. Sink 8-foot-long posts 2 feet deep at the end of each row and at 24-foot intervals within each row. That will give you four posts per row. Between the wooden posts, sink 8-foot-long steel fence posts 2 feet deep at 8-foot intervals. Along your 72-foot row you will have a total of four 6-foot-tall wooden posts and six 6-foot-tall steel fence posts. Tightly stretch 13-gauge wire at 40, 52 and 64 inches above the ground. Secure the end posts with earth anchors—large screws with rings on top, twisted into the ground with a bar.

Either one of these articles is worth the read.


Read more...

Pruning Grapes

Tuesday, March 06, 2007

Ah, pruning, my favorite gardening activity. I just love taking the saw and hacking things down that have gotten out of hand. In the last post, I talked about planting your grapevines. I found this article on pruning and was one of the most informative of all that I read.

Standing in front of a mass of tangled grape vine and wondering what to do with it can be a scary experience for the novice or even for the more experienced pruner. Keep in mind two essential ideas:

1. Don't be afraid to cut. When you finish, about 90% of last year's growth will be cut.
2. Grape plants are vigorous, and forgiving. Even if you make a mistake, you'll get a chance to fix it next year.

With that said, you can approach your pruning in a spirit of learning and adventure, not panic. Grapes are best pruned in spring (February/March, or even as late as early April) because if pruned too early a hard frost in late winter can damage the canes and buds.

Starting Young Plants Off Right

When you get your new grape plant it probably will not be pruned; instead you will find a vigorous root system and a lot of bare shoots rising out of the top. At planting time in spring you should reduce these numerous shoots to one, and cut it back to three buds (Step 1). After planting, the vine will begin to grow, and push out new green shoots. When these shoots are 8-12" long, choose the best one and support it by tying to a stake at top and bottom. Look for a strongly growing shoot, upright or nearly so, coming directly out of the old stem (not from the underground root system). Remove the other shoots (Step 2).
Pruning Young Plants Sketch
As the shoot grows throughout its first summer, continue tying it up the stake to keep it straight and prevent breaking in the wind. This shoot will be your permanent trunk, lasting the whole life of the vine, so it pays to keep it as straight and upright as possible.

First Dormant Pruning

Your first-year vine should have reached to or above the first trellis wire (about 30") during the previous season's growth. If it hasn't, cut it back again to 3 buds, and repeat the previous year's treatment. This may seem drastic, but necessary to establish a sound trunk. Most plants are vigorous and will reach the wire easily. If the last year's shoot just reaches the wire or a few inches beyond, cut it at the first bud above the wire and tie the shoot to the stake and the wire (A). If the shoot is longer, tie it to the stake and wire, cut the vine four or five buds beyond the tie, bend the remaining length of shoot down to the wire and tie (B). Very vigorous shoots may go well above the wire and put out strong side laterals. Choose the two laterals that are closest to the wire, tie to the wire, and prune to 3-5 buds. Tie the main stem to the wire and stake, and cut just above the side laterals (C).
First Dormant Pruning Sketch
During the summer, train the new shoots up to the next wire, and remove any new shoots that sprout from the root area or lower trunk.

To read more of this article, visit this Washington State University site.


Read more...

Planting Grapes

Thursday, March 01, 2007

With Spring just around the corner, 19 days to be exact, I thought it would be a good time to start talking about plants that can be grown to make beer or wine with. So for must of the month of March, I'll be covering how to plant and care for grapes and hops. I will also do a post on making your own malted barley. So first up, planting your grapes.

Selecting a site

Growing grapes well requires a long-term commitment. Vines require several years from time of planting to first harvested crop, and they normally do not reach full production until the fifth or sixth year. Grape plants can survive for 50 to 100 years, provided you care for them properly. Thus, it’s important to consider carefully both site selection and site preparation before you plant.

The first step toward consistent production of high-quality fruit is choosing a sunny location. Avoid frosty areas, as new shoot growth in April and May is very susceptible to frost injury. Sheltered home surroundings and sites usually are warmer. If possible, choose a sloping area, especially a south or southwest slope, because they generally have higher temperatures and are less likely to get frost.

In addition, if you plant in a row that goes in a north–south direction, the fruit and leaves will be better exposed to sunlight than in east–west rows; this way, you’ll produce better quality fruit.

Soil

Grapes grow on a wide variety of soil types. An important soil factor is drainage. Your grape plants won’t grow well if you have heavy clay soils with poor drainage or soils with an impervious subsoil claypan.

The soil should be free of perennial weeds and well tilled before you plant. You can improve the organic matter content of heavy clay soil by incorporating sawdust, manure, or compost; use only well-decomposed (rotted) material.

Don’t place compost directly in the planting hole; instead, incorporate it into soil in the whole planting area. You usually don’t need to add fertilizer at planting time.

Planting

Plant grapes in early spring as soon as you can work the soil. When you buy dormant, bare-root plants, make sure roots don’t dry out before planting. If you’re transplanting from a propagation bed or nursery, dig plants carefully to avoid breaking roots.

At planting, prune off all broken roots, trim very long roots, and prune off all but one vigorous cane from nursery-bought plants. Prune the cane back to two buds before planting. Set plants in a hole large enough to spread roots without bending them and to the same depth they were grown in the nursery.

Firm soil well around roots to remove air pockets, and water thoroughly. Leave a slight depression around the base of the plant to make watering easier. Irrigate plants as required.

Young grapevines can’t compete with weeds or established lawn grass for water and nutrients. Keep the planting free of all weeds. Cultivate shallowly, no deeper than 1 to 3 inches, to avoid injuring roots.

Spacing

The spacing between rows depends in part on the training and trellis system you choose. In backyard plantings, 9 feet generally is suitable.

Spacing within the row depends on the cultivar you plant and the training system you use. Space European cultivars (Vitis vinifera) 6 to 7 feet apart. You can set American cultivars (V. labrusca) 7 to 8 feet apart in the row, because they are more vigorous (have longer internodes).

You can read more of this article at the Oregon State University's Ag Extension. The original article was written by Bernadine C. Strik, Extension berry crops specialist, Oregon State University.


Read more...

Wine Making In 8 Simple Steps

Thursday, February 22, 2007

After about six years of wine making and learning about acid testing, pH, balance etc., you wonder if you can condense the process down to just a few simple steps. These simple steps are assuming the following:
1. You are going to use store bought juice’s. ie. Welch’s frozen or any other that does not have preservatives added;
2. You plan to consume your wine as early as possible, usually about 2 – 3 months after primary fermentation;
3. Your not out to win any awards but what something you can kick back with and enjoy.
I know many winemakers would cringe with the 3 assumptions above, but I feel there numerous people looking to get into winemaking and would like to take a simple approach. Or, maybe your are an experienced winemaker looking to make a batch for quick consumption. Either way, here are the simple steps to making wine.
This procedure is designed to make 1 ½ gallons which will probably end up being about 1 gallon bottled.

Procedure

1. Use two 11 ounce frozen juice to 1 gallon of must for a medium bodied wine. For a heavy bodied wine use 4 to a gallon. That means you will need 3 to 6 to make this batch.
2. Dump juice into your primary fermenter and add enough water to make 1 ½ gallons. Check the sugar content by using your hydrometer. If needed add enough sugar to bring the hydrometer reading to between 1.080 – 1.095. Retest after adding sugar and if higher that 1.095 dilute with a little water.
3. If you wish to, you can add two crushed campden tablets to your must. I really don’t think you need to since your must is pretty much sterilized. If you do add campden tablets, you will have to let the must sit for a day prior to adding the yeast.
4. Add your yeast nutrient
5. Add your yeast. Personally, I prefer to use half a packet of dry yeast.
6. Allow to ferment for 7 – 10 days then rack over to secondary fermenter.
7. If you plan to add oak chips, now is the time for that. Keep in the secondary for about 6 to 8 weeks. Rack again.
8. About 2 weeks after the last racking, you can begin to consume your masterpiece. I use either a 1 gallon or 2 gallon plastic water jug with a spout, if I plan on drinking my wine immediately. Otherwise, I just bottle it for later.

There you go. Eight simple steps to making wine. Nothing real hard about it and the best thing is that you can begin drinking it in about 2 to 3 months. Give it a whirl and let me know how your masterpiece turned out.


Tech Tags:

Read more...

Cleaning Tips

Tuesday, January 09, 2007

I'm back from my "posting vacation" and ready to start the new year. I have planned some changes for this site over the next year and will be posting about them at a later time

With, the start of a new year it is time to make a "clean" sweep of last year's mistake. And, speaking of cleaning, cleaning your equipment should be one of your top priorities prior to making any wine. Cleaning is different than sanitizing in that cleaning is just removing the visible dirt and soil from your equipment. Sanitizing is the killing of the bacteria that can produce off flavored or bad wine. For a list of sanitizers, check out the future home of Making Homemade Wine and Beer, by clicking here.

1. Wash your hand before working with equipment.

2. Avoid wearing dirty clothes.

3. Before using equipment, inspect, rinse, clean and sanitize, and rinse again.

4. After using equipment, inspect, rinse, clean and sanitize, and rinse again.

5. Before using racking cans, filters, or bottle fillers, clean and sanitize.

6. Avoid starting a siphon with your mouth.

7. Use fresh, dry dishtowels.

I know, pretty basic stuff, but it usually is the small things that we do that makes or brakes a wine.


Read more...

How To Make Beer - Part 3

Thursday, September 28, 2006

This is the last in a short series on how to make beer.  The picture above is a good example of what a "true" all grain brewer would be getting into.  A lot more equipment and time, but a better control over your beer.  On the other hand, if you want to try brewing an all-grain beer without too much of an investment, visit J. Kelly's Homepage.  Nice little set-up for very little cost.  Personally, I use the partial mashing technique (last Thursday's post) because it saves time and I also don't want to take up a lot of space with my hobby.  Keeps the wife happy.  Here are the steps in making an all-grain beer:
 
All Grain Brewing
 
1.  Heat 1 1/3 quarts of water for every pound of grain.  The temperature should be around 160 - 170 degrees F.
 
2.  Mix in the crushed grains and stir well.
 
3.  Temperature at this point should be 150 - 158 degrees F and water pH should be 5 - 5.5
 
4.  Hold this temperature for about 60 - 90 minutes to get a full starch conversion.
 
5.  In another kettle, heat up 2 quarts of water per pound of grain
 
6.  After the starch conversion, raise the temperature to 160 - 170 degrees F.  Keep at this temperature for 10 to 15 minutes.
 
7.  Ladle the mash into a lauter tun.  A lauter tun is basically another kettle that has a false bottom that allows the wort through and keeps the grains behind.  Think big strainer.
 
8.  As the mash is draining in the lauter tun, take a sauce pan and draw off about 2 quarts of wort and add it back into the lauter tun.  This is call recirculation and what recirculation does is filter out any large particles.  This will take about 10 - 15 minutes and by that time you should have a clear liquid.  Add this to your brewpot.
 
9. Next begin to slowly add the sparge water (step 5) and allow it drain down through the grains.  This will take between 45 - 60 minutes. So you might as well grab a beer by this time.  Add the liquid to your brewpot.  At this point you should have 6 to 7 gallons of wort if doing a 5 gallon batch.
 
10.  Boil the wort for about 60 to 90 minutes and add the hops and other ingredients according to your recipe.
 
11.  Chill the wort.  Most "All-Grainers" use a wort chiller.  Siphon the wort to your primary fermenter and add yeast.
 
As you can see, there is a lot of time involved.  If you are using a hand cranked crusher, doing 10 pounds of grain will take some time.  Hopefully, you can get your partner involved in this and make a day of it.  Because, in most cases, it will take almost a good 8 hours.
 

Technorati Tags : , ,
Powered By Qumana

Read more...

How To Make Beer - Part 2

Wednesday, September 20, 2006

Last week I covered how to brew your batch of beer using the extract method. This week we will cover partial mashing. With this method you will be crushing pale malt and using it as a partial substitute for malt extract. You will still continue to use speciality grains (see October 2005 post) to add additional flavor and character to your beer.

Partial Mashing Steps

1. Add 1 1/2 quarts of water per pound of grain to your brew pot. So for example, you are using 5 pounds of grain then you will need 7.5 quarts of water or almost 2 gallons. Your water should have a ph reading between 5.0 to 5.5 to achieve optimal results.

2. Heat water to between 160 to 168 degrees F.

3. Add crushed malt to water and mix well. Ideally when you crush the malt it shouldn't look like cornmeal. The husk on the grain should be split but not completely off. Personally, I tend to crush my speciality grains to a cornmeal consistency. It seems to me that I get a thicker more flavorful wort that way. I have also done it for an all-grain batch, but it tends to be messier and more of a hassle when draining and sparging.

4. Stir the wort and check the temperature. You want get the temperature to 158 degrees F. Once that is done, cover the brew pot and maintain that temperature for 60 minutes.

5. In a separate pot, heat 2 quarts of water per pound of grain to between 160 to 170 degrees F.

6. After the starch conversion (original pot with grains) has simmered for 60 minutes, raise the temperature to between 160 to 170 degrees F and hold for 15 minutes.

7. Pour the mash into a strainer that is suspended over your brewing bucket. I bought a large stainless steel colander to use in cottage cheese and it fits perfect over the brewing bucket. Allow to drain for a few minutes.

8. Next take the strainer full of grain and put it over your brew pot and pour the cloudy wort from your brewing bucket over the grains in the strainer.

9. Pour the sparge water over the grains and allow to drain for 5 to 10 minutes.

10. Remove the strainer, add your extract and begin your beer.

Next Thursday: All-Grain Brewing

Technorati Tags : , ,
Powered By Qumana

Read more...

How To Make Beer - Part 1

Thursday, September 14, 2006

So, your tired of the mass produced swill that you have been drinking.  Your ready to make a change and you want to make your "perfect" glass of suds.  Well, grab a beer, sit back and for the next few Thursdays, learn how to brew your own beer.
 
Now, in the old days, making your own beer was a long process and still is for the all-grain brewer.  But, thanks to modern technology, you don't have to spend hours making beer.  There are 3 basic methods in making beer.  You can be an extract brewer and this will also include those who use a kit, a partial masher, or an all grain brewer.  If you are a beginner, then you might want to make quite a few extract batches before move up.  I will cut down on your frustration factor big time.
 
The outline for this series is pretty simple.  I'll go over the steps of the 3 basic brewing methods, talk about some equipment, and give some helpful hints in brewing.  Today we will cover the steps in making an extract beer.
 
Extract Brewing Steps
 
1.  Fill your brewpot about 2/3 full of clean water and set on the stove.  I usually use bottled water since it doesn't have chlorine.
 
2.  Turn burner to medium-high
 
3.  Some people at this stage warm up their extract while waiting for the water in the brewpot to boil. I don't. 
 
4.  As the water begins to boil in the brewpot, open your extract and slowly stir it in with a long handled spoon.  Don't dump it in and hurry up and stir it.  It might clump if you do it that way and scorch on the bottom.  I've done it and it is a real pain to clean up.
 
5.  At this point, I take some of the warm wort out and put in the empty extract can.  Swirl it around to get as much extract as you can and pour it in the wort.  I usually do this several times to each can.  Makes for easier cleaning later on.
 
6.  Top off the brewpot to about 2 - 3 inches from the top.  Bring the wort to a boil (you might need to turn up the burner)  DO NOT, put a lid on the brewpot because it will boil over a create one heck of a mess.
 
7.  Boil the wort for the time of the recipe.  During this stage you will be adding hops and for the last 15 - 20 minutes adding Irish moss.  The Irish moss helps to clarify the beer by pulling the solid material out.
 
8.  After boiling, you must chill the wort. There are several different ways.  I pour cold water into my primary fermenter and then pour the wort into it.  Other people fill the sink with cold water or ice and chill down the brewpot. 
 
9.  After the wort has chilled below 100 degrees, take a hydrometer reading.  Use the chart that comes with the hydrometer to figure out how much more you need to add to your reading.  For a reading around 100 degrees, add .007 to your reading.
 
10.  Add the yeast.  I usually add my yeast around "blood temperature" (98 degrees), while others will only pitch around 70 degrees.
 
11.  I open ferment for the first 12 hours.  I tie a clean grain bag around the top of the fermenter and allow it to "breath".  After 12 hours, I put the lid on along with the airlock and allow it to continue fermenting for about a week.  If you are not into the open fermentation (most people will tell you that it will become contaminated and bad), then put the lid on and allow the beer to ferment.
 
12.  Keep your fermenter in a cool place during the week and keep it out of direct sunlight.
 
13.  After a week, take another hydrometer reading and either transfer to a secondary fermenter or begin bottling.  Your hydrometer reading should be 65 - 75% below your original reading before fermentation. ie.  Original reading 1.050  After a week it should be between 1.012 to 1.017.
 
If you have any questions about this process, please feel free to e-mail me.
 
Next Thursday:  Partial Mashing
 

Technorati Tags : ,
Powered By Qumana

Read more...

  © Blogger templates Newspaper II by Ourblogtemplates.com 2008

Back to TOP